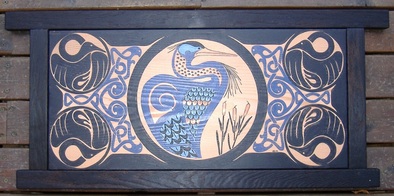
I have developed a strong interest in arts and crafts period furniture since moving to La Conner back in 2003. At that time we purchased a house in the historic district which was built in 1900 and had been renovated before we bought it. The age and style of our “new” home led us to look for period-appropriate furnishings, which in turn, gave us the opportunity to purchase several pieces of furniture. Two inspirational pieces in particular were a British arts and crafts armoire and a Jugendstil sideboard from Germany. This beautiful art furniture eventually directed me into doing more in-depth research about the arts and crafts movement, especially in Britain. Eventually this led me into making my own frames to go with my paintings: I was inspired to make an attempt to become a craftsman. The frames cannot be compared to the works of a true craftsman, but I strive to design and create the best frame I possibly can to complement each painting.
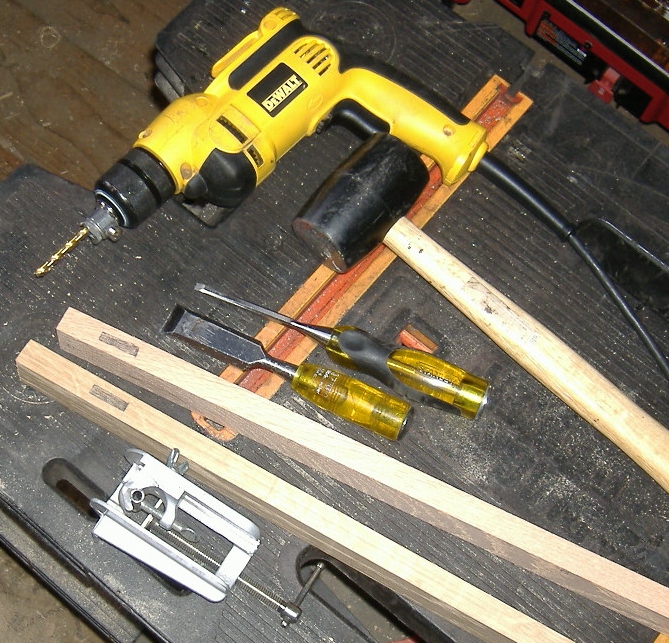
In keeping with the tenets of arts and crafts movement, I build my frames using pegged, mortise and tenon joinery. This gives the frames added strength and stability, as well as an interesting appearance. As I do not have power in my shop, my tool use is limited to an electric drill, electric orbital sander, hand saws and chisels. The wood I normally use for my frames is milled red oak. I mainly use 1x2 red oak boards but on occasion use 1x3 and 1x4 oak lumber. The designs for my frames are loosely based on commercial arts and crafts style frames as well as on Japanese-style structures. On occasion I have even designed the frame first before determining the painted design to be enclosed within.
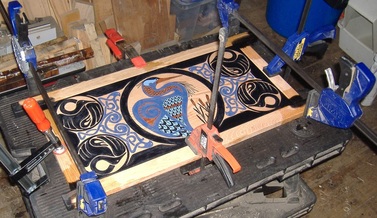
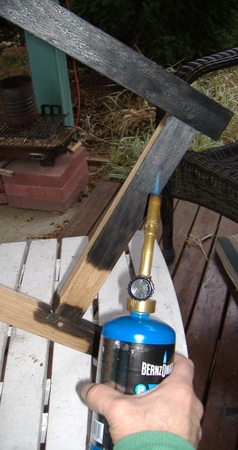
The frame itself is an integral component of the painting and it is to be considered part of the composition. In traditional Northern Northwest Coast Indian art composition, the black pigment commonly forms the primary formline outlining the composition. My blackened frames, using the Japanese shou-sugi-ban technique, constitutes the same for my paintings. They act to enclose the painting, forming a physical boundary around it. This concept is excellently articulated by Bill McLennan and Karen Duffek in their discussions about Kwakwaka'wakw carver and artist Doug Cranmer. (1)
In keeping with the tenets of arts and crafts movement, I build my frames using pegged, mortise and tenon joinery. This gives the frames added strength and stability, as well as an interesting appearance. As I do not have power in my shop, my tool use is limited to an electric drill, electric orbital sander, hand saws and chisels. The wood I normally use for my frames is milled red oak. I mainly use 1x2 red oak boards but on occasion use 1x3 and 1x4 oak lumber. The designs for my frames are loosely based on commercial arts and crafts style frames as well as on Japanese-style structures. On occasion I have even designed the frame first before determining the painted design to be enclosed within.
The frame itself is an integral component of the painting and it is to be considered part of the composition. In traditional Northern Northwest Coast Indian art composition, the black pigment commonly forms the primary formline outlining the composition. My blackened frames, using the Japanese shou-sugi-ban technique, constitutes the same for my paintings. They act to enclose the painting, forming a physical boundary around it. This concept is excellently articulated by Bill McLennan and Karen Duffek in their discussions about Kwakwaka'wakw carver and artist Doug Cranmer. (1)
(1) “In nineteenth-century paintings on boxes and chests, the physical nature of the object acted as a boundary to the composition, controlling the extent of the painted field. Cranmer has redefined the idea of visual containment through the repeated use of framing devices. Each composition is enclosed within a broad band of color painted around its edge. Forms may emerge from this border or taper off into it; elements are deflected from its surface or completed by its angular line. Both the color band and the surrounding wood frame are integral components of the finished work.”
Bill McLennan and Karen Duffek, The Transforming Image: Painted Arts of Northwest Coast First
Nations, ©2000, (pages 261-264).
These are the steps I typically use to construct my frames.
Bill McLennan and Karen Duffek, The Transforming Image: Painted Arts of Northwest Coast First
Nations, ©2000, (pages 261-264).
These are the steps I typically use to construct my frames.
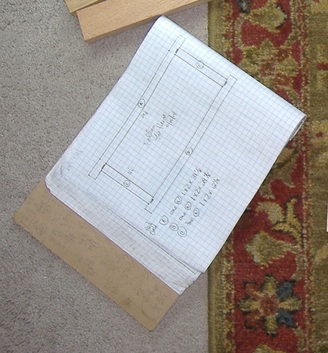
2.1 Design the frame to scale on graph paper
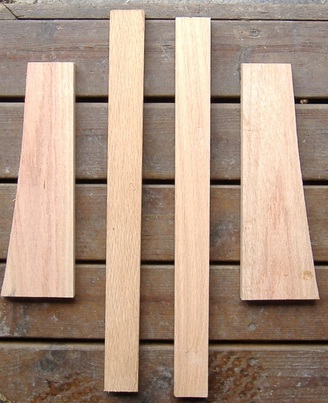
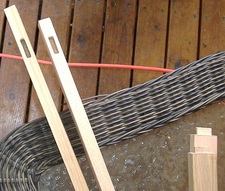
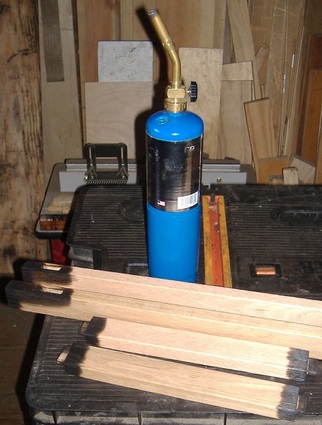
2.2 Cut the wood
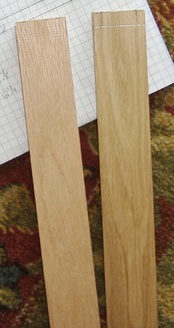
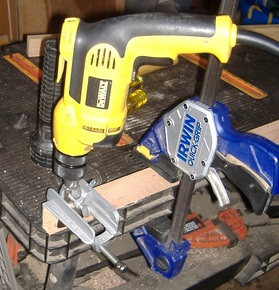
2.3 Draw and cut the tenons
| 
|
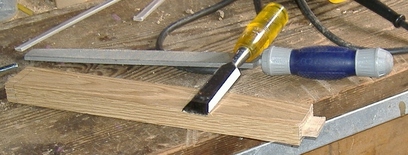
2.4 Draw, drill, and chisel the mortises
| 
|

| 
|
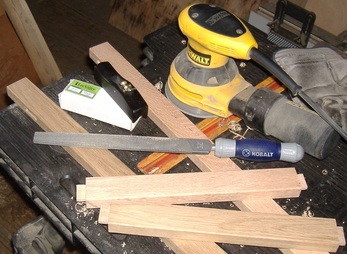
2.5 Sand, file, and plane the individual pieces
2.6 Pre-burn all joints using a propane torch
2.7 Glue the joints with Gorilla glue and clamp the frame (including the art piece)
2.8 Drill and peg the joints and glue with wood glue
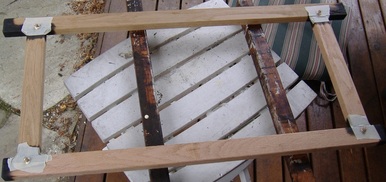
2.9 Cut the pegs flush with the surface and sand the frame again
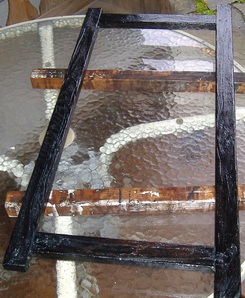
2.10 Burn the frame using a propane torch
2.10 Burn the frame using a propane torch
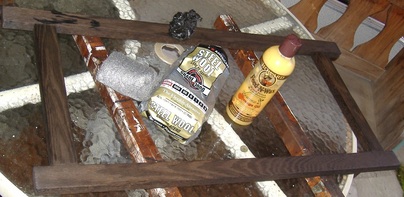
2.11 Burnish the frame with steel wool and wax with Howard Feed-n-Wax
| 
|
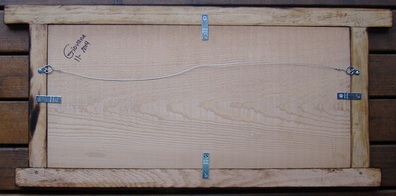
2.12 Attach the painting and the hangers to the back of the frame
And the framing process is finished. This typically takes two to three days to complete.
 RSS Feed